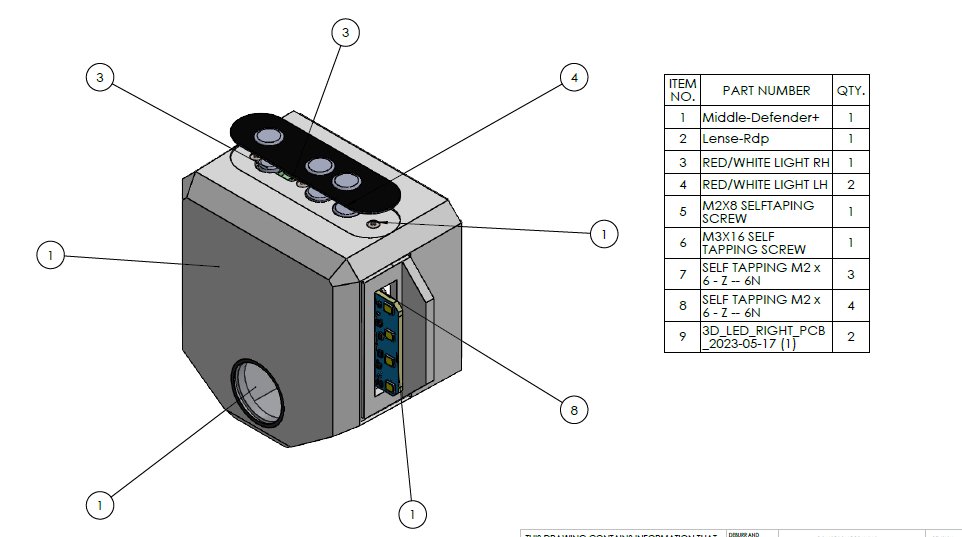
2D TECHANICAL DRAWING WITH GD&T AND ALL ENGINEERING PARAMETERS TAKEN LIKE SHEETMETAL, MACHINNIG,
Published by Pankajghcho
Technical drawing description with Geometric Dimensioning and Tolerancing (GD&T) is a crucial aspect of mechanical design engineering. GD&T is a standardized language used to define and communicate the design and manufacturing requirements of a part or assembly. It provides a precise and consistent way to convey information about the size, form, orientation, and location of features on a drawing. Here’s a breakdown of the key components and steps involved in creating technical drawings with GD&T:
Start with a 2D or 3D Model: Before you can create a technical drawing, you typically start with a 2D or 3D computer-aided design (CAD) model of your part or assembly. This serves as the basis for creating the technical drawing.
Select Appropriate Datum Features: GD&T relies on a system of datum features to establish a reference coordinate system for the part. Datum features are specific surfaces, points, or axes that are used as references for defining other geometric tolerances. These are essential for ensuring consistent measurement and manufacturing.
Identify and Apply GD&T Symbols: GD&T symbols are used to specify various geometric tolerances on the drawing. Some common GD&T symbols include:
Position: Specifies the allowable deviation from the exact location of a feature.
Concentricity: Ensures that two features share a common center point.
Parallelism: Ensures that two surfaces or axes are parallel.
Perpendicularity: Ensures that two surfaces or axes are perpendicular.
Cylindricity: Specifies the allowable variation in the cylindrical shape of a feature.
Dimensioning: Add dimensions to the drawing to specify the size of features. Dimensions are usually accompanied by tolerances, which define the acceptable variation from the nominal dimension.
Feature Control Frames: Feature control frames are used to convey GD&T information for a specific feature. These frames include the GD&T symbol, the datum references, and the tolerance values. They are typically placed adjacent to the feature being controlled.
Apply Material and Finish Specifications: Specify the material that should be used for the part and any required surface finishes. This information is critical for the manufacturing process.
technical drawing to ensure that all GD&T symbols and dimensions are correctly applied and that they meet the design and manufacturing requirements. Verification may involve tolerance analysis to ensure that the design is achievable within manufacturing capabilities.
Communication: Effective communication with manufacturing teams, suppliers, and other stakeholders is crucial. GD&T provides a standardized way to convey design intent and requirements, reducing the chances of misinterpretation.
Creating technical drawings with GD&T requires precision and adherence to standards (e.g., ASME Y14.5 or ISO 1101). Accurate GD&T can lead to improved product quality, reduced production costs, and better communication throughout the design and manufacturing process.