Twine is designed to make finding, hiring, and paying creative freelancers as straightforward as possible. Whether you’re bringing on an expert for a one-off project or building out a team across multiple disciplines, this guide covers the full journey, from getting your brief together to releasing final payment.
Each step below links to more details where it’s useful. Work through them in order or jump to the section most relevant to where you are.
Stage | What happens |
1. Understand your requirement | Get clear on what you need and gather the information for a strong brief. |
2. Set your budget | Work out a realistic budget range before posting. |
3. Post your job | Fill out your brief and submit it for review. Browse matched freelancers while you wait. |
4. Receive applications& choose a freelancer | Review vetted applications, ask questions, and confirm fit. |
5. Hire, pay & manage the project | Make a Vault payment to secure your freelancer and manage delivery. |
Step 1: Understand Your Requirement
Before you post anything, it’s worth taking a few minutes to get clear on what you actually need. The more thought you put in here, the smoother everything that follows will be.
Hiring a freelancer can feel unfamiliar, particularly if you haven’t done it before or you’re new to Twine. That’s normal. The key is understanding your job well enough to describe it clearly. You don’t need to have every detail figured out, but you do need a reasonable picture of what success looks like.
Ask yourself:
- What is the specific deliverable? (A finished logo, a 2-minute video, a shipped feature, a written article?)
- Who is the audience for this work?
- What does good look like? Can you point to any examples?
- Are there any technical requirements: tools, formats, platforms?
- What’s the timeline, and are there any hard deadlines?
- Who internally will the freelancer work with?
A well-considered brief attracts better freelancers. Vague briefs tend to attract vague pitches and lead to misaligned expectations further down the line.
Step 2: Set Your Budget
Once you have a clearer picture of the scope, you’re in a better position to think about the budget. This doesn’t need to be exact; a range is fine, but having something in mind before you post will help you attract the right people.
When filling out your brief, include a budget range rather than leaving it blank. Freelancers use it to decide whether to pitch, so a missing budget doesn’t protect you from high quotes; it just means fewer people apply.
💡Tip
Freelance work takes real time, skill, and often expensive tools. Trying to hire at the lowest possible rate tends to produce disappointing results or means hiring twice. Set a reasonable budget and work with someone who’s genuinely good at what they do. You’ll get a better outcome and a better experience.
Step 3: Post Your Job on Twine
Posting a job on Twine takes around two to five minutes. You’ll answer a series of questions about the role and the project, and Twine uses your answers to match your brief to relevant freelancers in the community.
Your brief should cover:
- Job title: Be specific: [Seniority] [Role] to [Outcome] for [Context]. e.g. “Mid-Level Brand Designer to Refresh Identity for D2C Fashion Label”
- Project description: Overview, deliverables, target audience, style direction, technical requirements, and how you’ll collaborate. Clearly describe, what’s included, and what isn’t. A clear scope avoids misunderstandings later.
- Experience level: Beginner through to Expert. Match this to the complexity of the work.
- Budget: A range is fine. Clarity here helps freelancers self-select.
- Timeline: Project duration and any fixed milestones or deadlines.
- Location: On-site, hybrid, remote within country, or full remote.
Once submitted, your post goes to the Twine team for a quick review before going live. While you wait, head to your dashboard and invite anyone whose work looks like a strong fit.
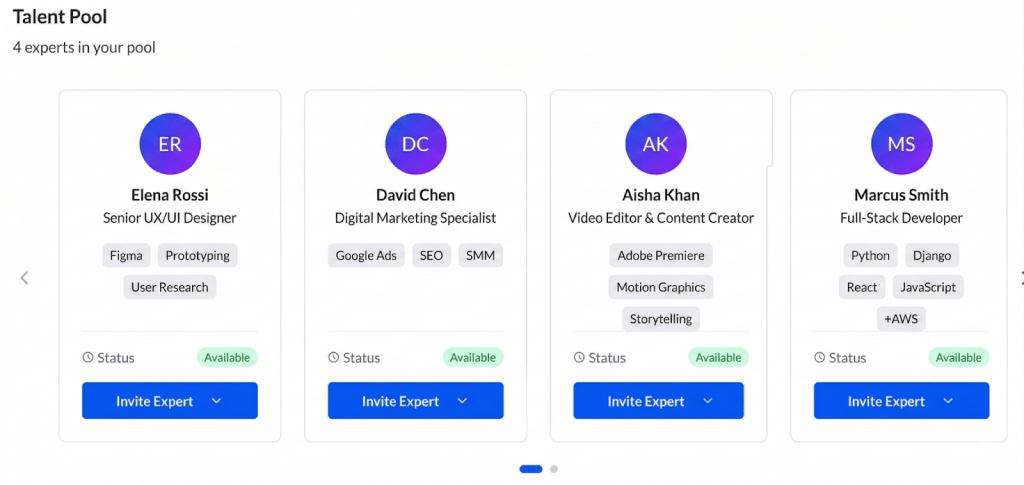
Already have someone in mind? If you’ve already saved freelancers to your talent pool from previous projects or while browsing profiles, go to their profile, click Invite, and select Hire for new job to bring them directly onto your project.
Step 4: Receive Applications & Choose a Freelancer
Once your job is live, Twine notifies community members whose skills and experience match your brief. For popular roles, you can start seeing applications within minutes.
How applications work
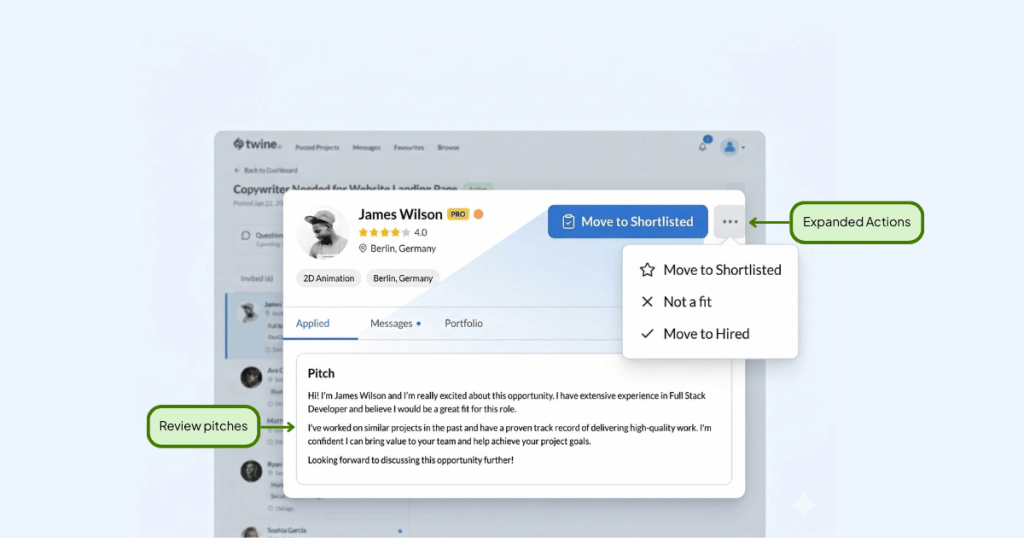
Applications are reviewed by the Twine team before they reach you. To pass, a freelancer needs relevant portfolio examples and an application for your project. This means every pitch you see has already cleared a basic quality check.
When reviewing applications, look beyond the message. Does their portfolio show work similar to what you need? Have they done this type of project before? A concise, confident pitch with the right examples often says more than a lengthy one with generic work.
Managing your pipeline
Your project dashboard organises every applicant into a clear pipeline. You’ll land in the Applied view by default. Move candidates through stages as you evaluate them:
Stage | Who’s here | What to do |
Invited | Freelancers you’ve reached out to directly via brief-matched recommendations. | Send invitations while your job is under review. |
Applied | Vetted applications are waiting for your review. Your default view. | Review pitch messages and portfolios. Move promising ones forward. |
Reviewed | Candidates you’ve assessed in more depth. | Move here after portfolio review and initial conversations. |
Shortlisted | Candidates you’ve flagged for closer consideration. | Use this as your working shortlist. Compare top picks side by side. |
Hired | Freelancers you’ve selected for the project. | Move here when ready to proceed. Triggers the payment flow. |
Declined | Applicants, you’re not moving forward with. | Decline promptly, it’s good practice and keeps your dashboard tidy. |
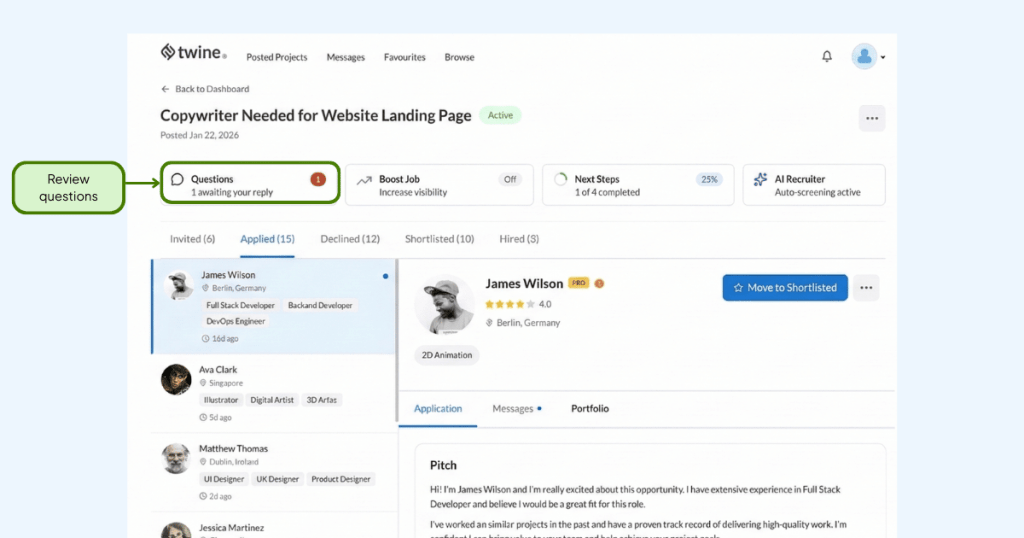
Public questions
Freelancers can submit clarifying questions about your brief. These are vetted by Twine, sent to you anonymously, and once you answer, published alongside your job listing so all applicants can see the response.
Questions often come up around style direction, reference material, or revision expectations. If a question reveals a gap in your brief, it’s worth updating your description; better applications tend to follow.
Confirming fit before you hire
Once you’ve shortlisted someone promising, use the messaging to confirm a few things before committing:
- Availability: Can they deliver within your timeline?
- Capability: Do they have the specific skills and tools your project requires?
- Process: What are the steps from briefing to final delivery? How many revision rounds are included?
- Payment preference: Would they prefer a single upfront Vault payment, or a series of milestone-based payments?
Make sure your agreed-upon terms are documented in your shared messages before you select “Hire”. This protects both you and the freelancer if questions come up later.
Step 5: Hire, Pay & Manage the Project
You’ve found the right person and confirmed they’re ready to go. Here’s how the hiring and payment process works on Twine.
Securing your freelancer
Once you select “Hire”, you’ll be asked to make an optional upfront Vault payment via credit or debit card. This secures your freelancer and signals that the project is ready to begin. The funds are held safely by Twine, not released to the freelancer, until you choose to release them. You are allowed to pay your freelancer directly outside the platform if you wish to do so. But we encourage payment through Twine to protect both parties.
Making a payment
There are two ways to make a payment once a freelancer is hired:
Option | How it works | Best for |
Vault Payment | Funds are held securely by Twine and released when you’re ready, either at a milestone or project completion. Auto-released after 90 days if not released manually. | Projects with clear milestones, or where you want added confidence before releasing funds. |
Direct Payment | Payment is sent to the freelancer immediately, without being held in the vault. Typically takes up to 14 days to process. | Smaller tasks, ongoing work, or where you’ve already established trust with the freelancer. |
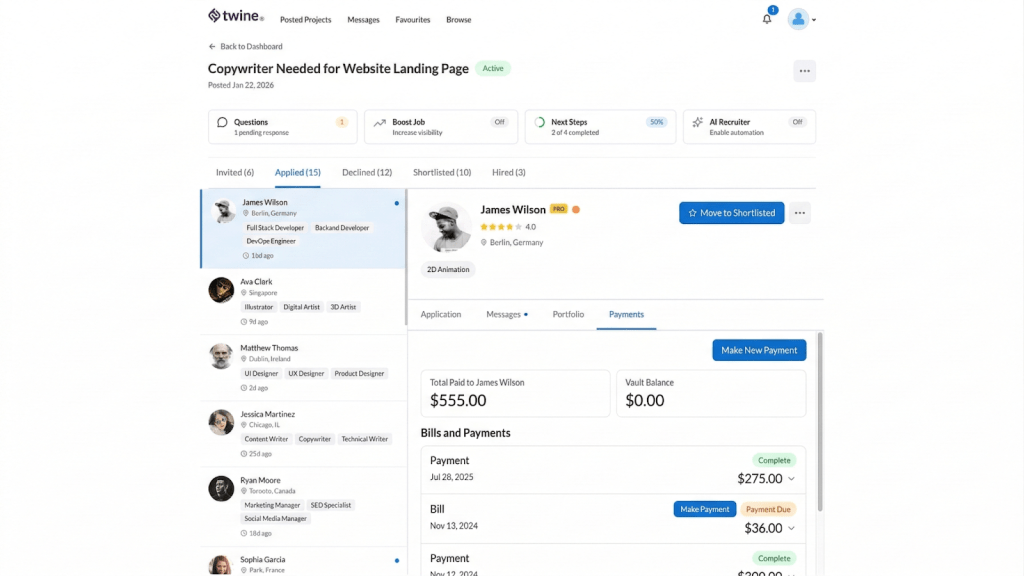
Step-by-step: making a payment
- Go to the projects page and confirm the freelancer is marked as Hired.
- To create a new payment: Click “Make New Payment”, enter the amount. To add your payment to the Twine vault, select this at the payment stage; if not selected, it will be released to the expert right away. If your freelancer issues bills, then payments are released without hitting the vault
- To release a vaulted payment: click the three dots next to the project, select “Release Payment” and choose to release the vaulted funds.
- Once a milestone is reached, return to Manage Jobs and click “Release” to pay out the vaulted amount.
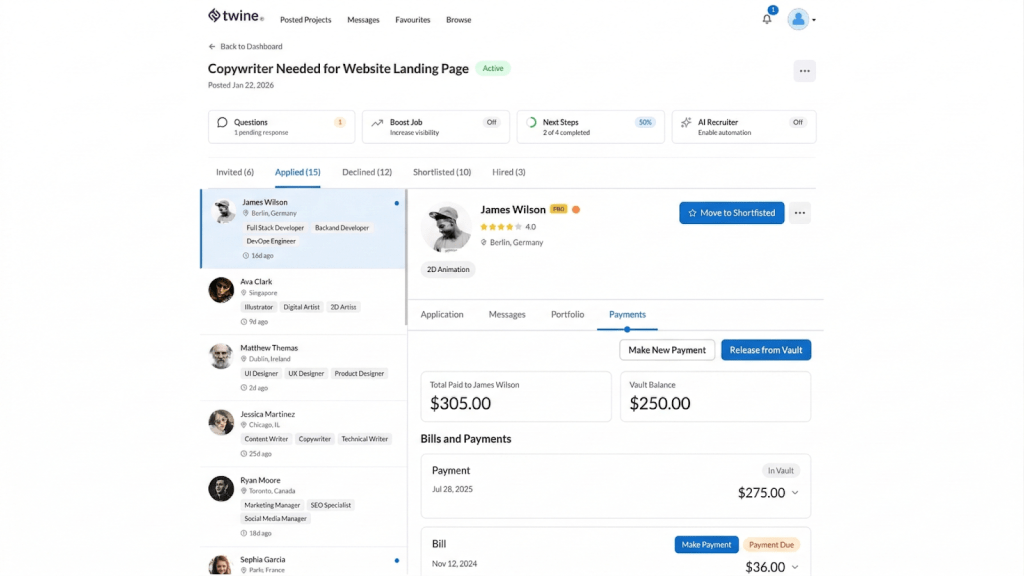
Managing ongoing work
After the initial Vault payment, you can work with your freelancer flexibly. They can issue bills through the platform as work progresses. You’ll receive a Statement of Work to review, and can release payment when you’re satisfied. Payment on a bill will be released right away.
If your project runs longer than 90 days, break it into smaller phases or milestones and make a separate Vault payment for each one. Vault does not currently support releasing part of a larger payment, and all Vault payments are automatically released after 90 days. Paying one milestone at a time gives you more control over how and when funds are released.
Hiring multiple freelancers
You can hire more than one freelancer for the same jobs, useful if you’re building out a team or need complementary skills covered in parallel. Payments for each freelancer work are made independently, in the same Vault or Direct.
You can also end a hire with one individual while continuing to work with others on the same project; there’s no need to close the whole job.
Ready to Get Started?
Hiring on Twine is designed to be simple at every stage, from writing your first brief to releasing final payment. Follow the steps above and you’ll have a freelancer lined up faster than you might expect.
Quick recap:
- Get clear on what you need and what success looks like before posting.
- Set a realistic budget range, it helps attract the right freelancers.
- Write a specific brief. The more detail, the better the pitches.
- Review vetted applications, check portfolios, and confirm fit in messages.
- Secure your freelancer with a Vault payment and release funds when you’re happy with the work.
- You can hire multiple freelancers on one job, and manage each independently.
Start hiring on Twine: Post your job, browse matched freelancers, and find the right person for your project.